How to set up two-factor authentication on Facebook: Facebook is one of the most popular social-media networks, and any responsible user understands that online security has never been more important. One of the first things you should do after creating a Facebook account is go into the security settings and enable the two-factor authentication (2FA) option.
What is the significance of this? Even if someone knows your password, two-factor authentication prohibits them from accessing your account. When connecting into Facebook from a new device, you use a second factor that only you have to authenticate your identity.
The second factor can be a code created by a phone authenticator app, a code texted to your phone by Facebook, or a physical security key plugged into a USB port on your computer.
We’ve included a detailed step-by-step guide for configuring two-factor authentication directly from your Facebook app using both your desktop browser and your mobile devices below. Please keep in mind that some of the components in the screenshots below have been deleted or blurred for privacy reasons.
How to set up two-factor authentication on Facebook using a browser
1. After heading over to your newsfeed page on www.facebook.com , click on the arrow icon located on the top right corner and select the ‘Settings & Privacy’ option.
2. Next, click on Settings as indicated on the menu below. This should trigger a new menu.
3. Once you’ve opened up the settings menu, go ahead and select Security and Login, which should appear as the second option from the top in the left-hand navigation bar.
4. Next, scroll down to the Two-Factor Authentication section and click on Edit in the “Use two-factor authentication” option.
5. You can now set up two-factor authentication in multiple possible ways, but let’s start with the first one — via an authenticator app.
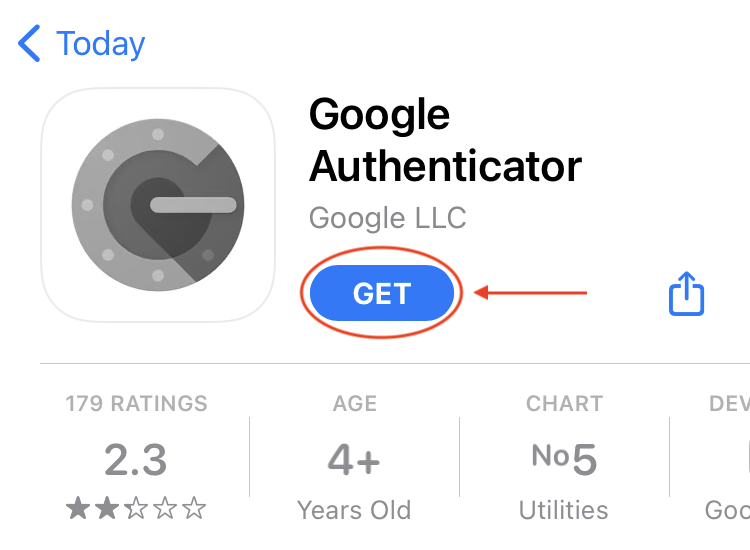
Of course, you must first download the app. There are numerous such programmes, all of which work in a similar manner and are free, but Google Authenticator is likely the easiest to get started with.
Navigate to your app store and look for Google Authenticator. Because we’re using an iOS device, the app page will appear like this:

Now, go ahead and click on ‘get’ in order to download the app.
After you’ve downloaded the app, open it and select Get Started. It will then prompt you to’scan a QR code’ or ‘enter a setup key.’ Now that we’ve arrived at this point, let’s return to Facebook.
6. After you’ve clicked on the ‘Authentication app’ option in the Facebook menu, you should see a little window with a QR code on the left side. Take out your smartphone, open the authenticator app you just installed, and scan the QR code with your camera by selecting ‘Scan a QR code’ from the app menu.
Alternatively, you can manually input the setup key by typing in the code that you should see on the right side of your browser’s window.
7. You should then see a six-digit code on your Authenticator app with an expiring timer to the right from it. Once the timer expires, the app will automatically generate a new code.
Go ahead and enter the confirmation code that you see on your app.
8. All done! You’ve successfully set up two-factor authentication on Facebook. You should now be notified/asked for a code whenever there’s unauthorised login from a new device or a browser. Click on Done in order to finalize the process.
9. Now, let’s circle back to step 5, where you can pick your preferred security methods for two-factor authentication. Another old-school option is to do so via a text message (SMS).
The idea is simple: whenever you log in from a new device, you will receive a temporary code by text message, which you will enter along with your password to gain access to your account. To begin, click on the ‘setup’ button.
10. If your account is already tied to a mobile phone number, you can select it by clicking on one of the options listed. Alternatively, you can add a new phone number by selecting the last option that appears in the menu. Done? All right, press Continue to proceed.
11. All set! Now you have two security methods set up for two-factor authentication, but let’s add more — better safe than sorry! The next option is to set up a security key, which you can use for verification. Click on ‘Setup’ to get started.
12. For this method, you have to have a USB security key. (You can get one for about $20 online.) We didn’t have one at hand, though all you need to do is to register it by clicking on ‘Register Security Key’ and following the on-screen instructions.
13. Now, last but not least, you can also set up two-factor authentication on Facebook using recovery codes. This is how it works: You will get eight 8-digit recovery codes that you can use to log in if you happen to lose your phone or if you can’t use an authentication app. Once you’ve clicked on Setup next to Recovery Codes, you should now be able to select Get Codes to get started.
14. For security purposes, we couldn’t include a screenshot for this step, though you should now be presented with your codes. One thing to note, however, is that each code can only be used once. Be sure to store your codes in a safe but accessible place.
All done! Congrats on setting up two-factor authentication on Facebook using all security methods!
Read more-
How to make your own Facebook avatar
How to set up two-factor authentication on Facebook using a mobile app
1. First, launch your Facebook app on your mobile device (we’re using an iPhone). Then click on the Menu icon located at the bottom right corner of the screen. (On Android, the Menu is in the top right corner.)
2. Scroll down and select Settings & Privacy as shown below.
3. Next, tap on the Settings option to reveal a new menu.
4. Scroll down to the security section and select Security and login to get started. (On Android, tap Password and Security.)
7. Another option is to do so via a text message (SMS). The gist of it is simple” Whenever you log in from a new device, you will receive a code via a text message to then enter in order to get into your account. If your account is already tied to a mobile phone number, you can select it by tapping on one of the options listed.
Alternatively, you can enter a new phone number by selecting the final option in the menu. To proceed, press Continue.
8. If you wish to use alternative ways, such as the recovery codes and security key, go back to steps 11-14 from the previous portion of the article because the procedures are the same.
9. Congratulations on enabling two-factor authentication on Facebook using all available security measures. To complete the transaction, click the ‘Done’ button.


